Purpose
This is a collection of silver point sketches. Some of these are studies of Durer sketches or contemporaries to learn how shapes were modeled, some are based on live models as suggested to do by Cennini to study form, and lastly so me of them are used to practice drawing the figures used in the oil painting as part of the pentathlon project.
My goal is to have a better understanding of the technique of using silverpoint, which in turn also aids in improving the drawing skills needed for preparatory sketches in future paintings.
Background
Silverpoint was a method of drawing that was popular from medieval times up until the end of the 16th century. It was used on manuscripts, panels and for studies.
Silver point is one of a variety of metal point mediums which transfers particles of metal to a surface. Common types of metal used in during this time were silver, gold, lead, tin, brass and copper. One advantage of silver point is its permanence as well as the fine precise lines it could create. It was soft enough to be smooth but didn’t blunt as quickly
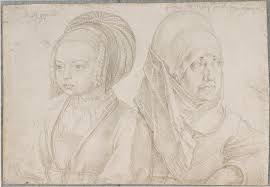
Portrait of an old lady and young woman by Albrecht Durer, Silver point
as the lead or tin that was used before it. However, like most metals, the support needed to be prepared with a ground to be able to leave a mark.
Lead could be applied directly to paper or parchment without a ground so that makes me think that some of the illuminated manuscripts used a lead stylus to draw out the miniatures. Cennini does say that you can apply pounce to a surface such as parchment to give it enough tooth to take the marks, so that is another option too.
In a few months the silver point lines in my drawings will tarnish and go from a light grey to a softer brown. Drawings done in goldpoint will not tarnish.
The use of silverpoint declined at the end of the 16th century as more artists were looking for a method that didn’t use a support that was so labour intensive. The support was treated with hide glue and finely ground bone ash to be able to have enough tooth to leave a mark. When graphite became available later at the end of the 16th century it was preferable. It was easier to use, could be applied straight to paper and was erasable.
Materials
Drawing Tools: Silver point kit from Natural pigments – metal holder, metal wire in .99mm and 2mm diameters in silver, copper, brass and lead.
Ground supplies: Prepared ground from the kit and a ground used in making panels. (Hide glue, Marble dust, chalk, titanium pigment, green earth pigment)
Paper: any heavy paper will do, this was purchased at Deserres
Parchment
Process
- First, I took some of my paper and tore into useable sizes, some for smaller sketches, some a bit larger to work out the design of the painting.
- Then I applied the ground. I used the ground provided by Natural Pigment, but also the gesso that I applied to my panels for painting. Both seem to work well. If you want a more modern method, you can apply white gouache to paper with some pigment to colour it and it will provide a useable surface.
Cennini says to “..Take bone from the second joints and wings of fowls, or of a capon, and the older the are the better. Just as you find them under the dining-table, put them in the fire; and when you see that they have turned whiter than ashes, draw them out, and grind them well in the porphyry”.
I like his description but since I had the kit, I used it along with the gesso I had prepared for the painting. See below.
The provided ground in the kit was a 1 to 1 mixture of ground to water and I let sit for 30 minutes. After that brush on to the paper and dry. I used 2 to 3 coats. I added some green pigment to this one
- Some of the papers were treated with the gesso from the panels. It is a mixture of rabbit hide glue, marble dust, chalk and titanium white pigment. Half of the batch had all marble dust, and half had a mix of the marble dust and chalk. I found the chalk to have a whiter finish. This mixture was used for panel supports at the time so the materials would be available for the late 14th century time frame I am focused on.
- Then sanded the paper. At first, I left them as is, but when I started to use them, I found that sanding made a nicer surface to use and still had enough tooth to leave a mark.
- When it came to drawing, I used the different metals that were in the kit and found that I liked the silver the most as the mark seemed to be a bit darker than the brass or copper. It also seemed to be smoother to use than either the brass or copper. I think because it is a softer metal.
- A couple months after these were done, I acquired some parchment and a lead point for the stylus. I was able to draw straight on the parchment with this stylus and used it to do some studies of silverpoint drawing that Durer had done for an illuminated manuscript. It makes very light lines, almost too light, but will darken over time
Drawing with the Stylus and Metals
The stylus can hold the thin and wide pieces of metal for thin and wider lines, shading is done by
- Spacing of lines
- Cross hatching (lines going in one direction, then on top in another direction).
- Value – lines can be gone over to make darker.
Applying the lines.
Silverpoint was viewed as a way to hone your skills as a starting artist. Since it was not erasable, you had to be very confident in how you applied the lines, or creative in how you covered up mistakes. The modern kit I used did provide a tool to erase but it would smooth down the surface too much if used with too much pressure. Disclaimer: I did use the eraser a few times but only sparingly
Cennini suggests the following when starting to draw with a stylus …
“…run the style over the little panel so lightly that you can hardly make out what you first start to do; strengthening your strokes little by little, going back many times to produce the shadow”
I found that starting out as above worked really well when I had enough control to move it over the page that lightly. It wasn’t easy to make marks that light at first. If the shape wasn’t what I wanted I could redraw and going over the correct line again detracted from the first one. Some of the Albrecht’s earlier had very light, lines around the outer edge that appeared to be the first contour lines of the drawing. After you could see the final contour lines.
He also describes going over areas with a wash made of enough water to fill a nutshell and 2 drops of ink. I love his measurements. This would also help to create a more shaded work.
I learned more about cross hatching in this process. In Durer’s earlier work, his hatches are not straight lines, more often his lines follow the shape of the form with curves. The cross lines will again follow the form so they give off a softer affect. Very few straight lines or hard angles in these drawings.
Drawings
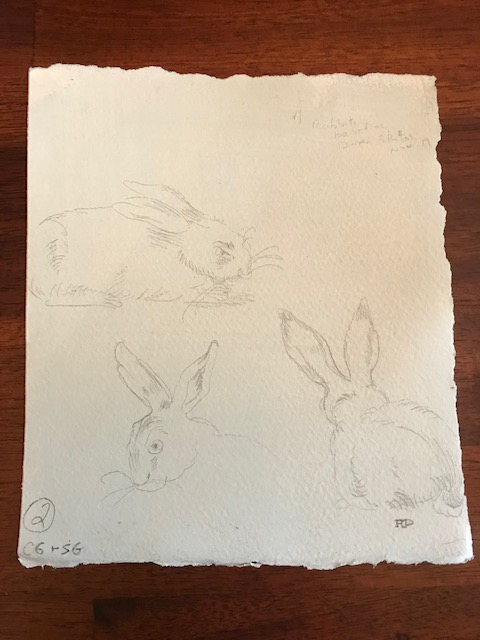
Based on Albert Durer’s Rabbit sketches. Silverpoint on chalk ground and silver point ground from kit. Copying marks and shapes, focusing on lines.
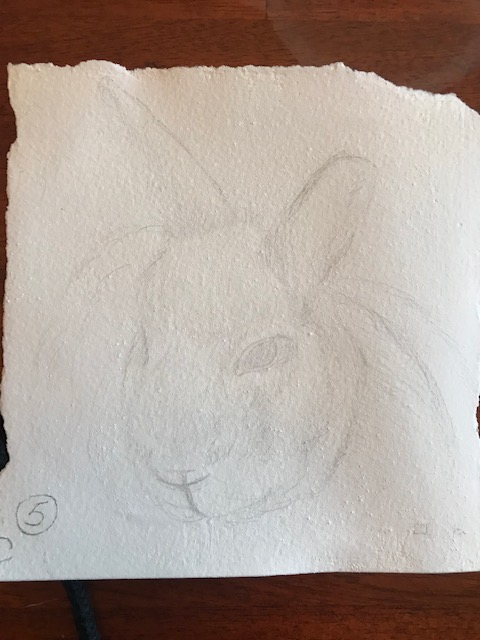
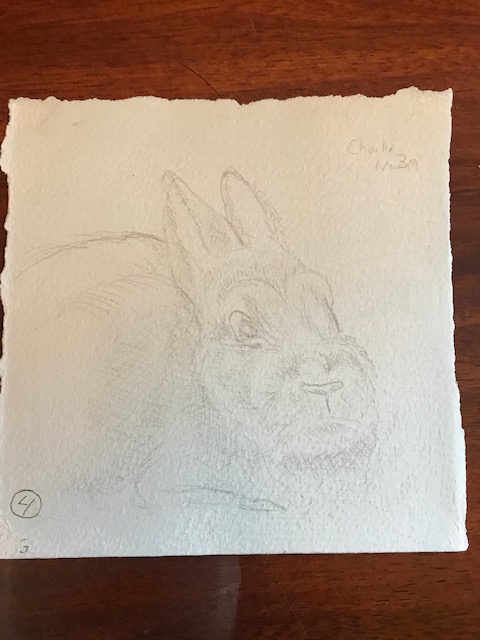
Drawing of my rabbit Charlie, Silver point on silverpoint ground from kit. Focusing on varying tones of fur.
Drawing of my rabbit Kate, Brass point on chalk ground. Found this much more difficult but the paper wasn’t sanded so I think that was the problem. The marks are much lighter
Based on Albrecht Durer sketch of an old lady and young woman. Silverpoint on chalk ground and silver point ground from kit. Focusing on modelling and method of shading in the folds of the veil, and the face.
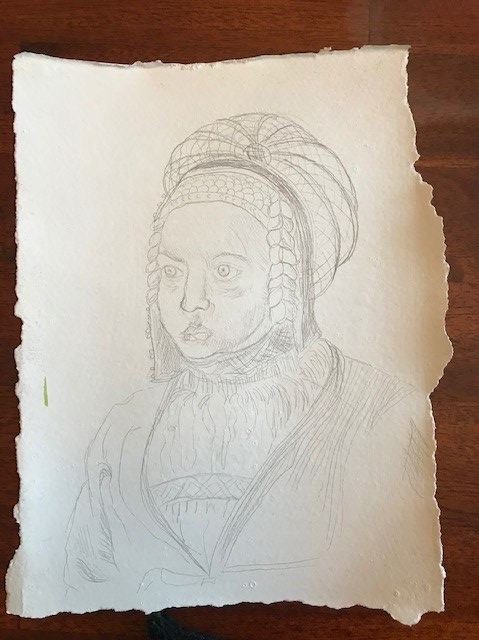

My mothers face substituted into a sketch of the Barbara Durer painting. I will use this one for the painting

Studies of Albrecht Durer’s drawings of his hand and his portrait of himself as a young boy. The hands have a very different style that his later drawings. The lines are much looser. Shapes are more fluid. Not a lot of hatching, instead a lot of the shading is done by proximity of lines. The lines follow the form.
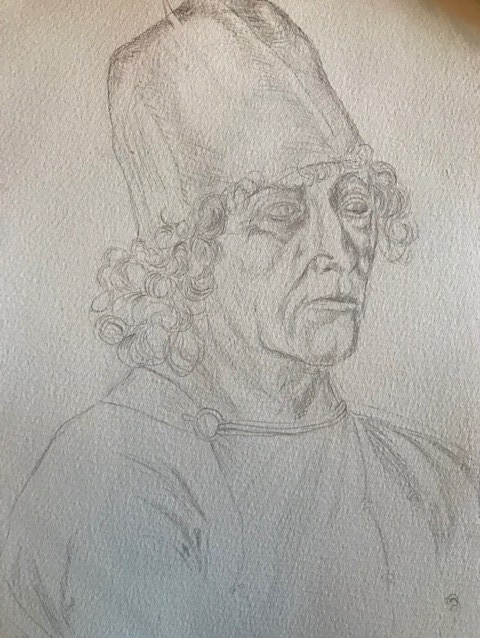
Self portrait of Albrecht Durer the Elder. Done in silver point.
What was learned.
My initial goal in this project was to improve my drawing technique by using the silverpoint. To this end I made studies of Durer’s drawings and others to better understand the techniques he used and to apply them to a preparatory sketch of my mother as Barbara Durer for the Oil Painting that is done as part of this Pentathlon Entry.
I applied the techniques that I observed in his rabbits to my drawings of Charlie and Kate (my rabbits). The study of his drawing of an old woman showed me how to model the shapes in my mothers face, and make my preparatory sketches for the painting.
Using lead point, I made a few drawing on parchment based on some silverpoints he made for illuminated manuscripts. It was nice to use it straight without having to add a ground to the page, but I found it very light (too light for a picture). Lead is very soft, if you pressed even a little the thinner lead point would bend. It needed to be placed very far into the holder. The lines were so soft and gentle and took a long time to build up but was very nice to use.
Overall, I wanted to practice and improve my drawing skills for future paintings. My last two studies were the drawings of a younger Albrecht Durer at the start of his career which had a looser style than the second self-portrait done by his father later in his career. I feel that there is a definite progression in my drawing from my first sketch to the last.
